Wednesday, 18 April 2012

Anabelle's Album

I went to my first scrapbooking retreat this past weekend. It was amazing! I will blog about my experience later. First, I like to share one of the projects I worked on while there.

A little history:
My good friend Andréanne and I share similar philosophies on many things including family and friends. She and I both believe that friends are the family you choose. So when Andréanne and her husband Martin, after difficulties, celebrated the birth of their beautiful and very-much wanted daughter Anabelle, I had a new niece to love and spoil.

I wanted to celebrate Anabelle's birth in my own way. I decided to do so by making her (and her parents) an album. I decided to go with a Close to My Heart 6x6 chipboard album. I was so excited to make this album! Yes, I really wanted to give my friend's daughter a beautiful heartfelt gift blah blah blah...Really, I just wanted to have an excuse to use pink and sparkles and flower and frilly ribbon! I know, selfish reasons but my heart was in the right place!

I used the same paper collection throughout the project: Echo Park This & That Graceful.

Here is the cover page:


I made the rosette flower myself and used a Big Shot to cut the small flowers. The bling is from Close to My Heart. I used pop-up tape to add dimension to the stickers from the This & That collection. I finished it off with a beautiful picture of Anabelle.

The first double-page layout features pictures of the happy new family/parents:


"Famille comblée" means a family completed. On this page, I layered a sticker from the collection, die-cut flowers, a hand-made rosette, a pearl swirl, a crocheted flower, a chipboard heart that I embossed with chestnut embossing powder, and the 'Love' metal accent.


The second double-page layout features Anabelle with her papa and with her maman:


Andréanne gave me so many great pictures! I had such a hard time picking which ones to use. To increase the number of pictures I could use, I used tags to make a mini-layout within the layout.


Andréanne and Martin are surrogate parents to Martin's 13 year-old cousin Mégane. Mégane was so excited to have the opportunity to be a big sister. She is such an important part of Andréanne, Martin and now Anabelle's life that she had to be in the album.

I used the Big Shot to cut the butterfly and I added a little pearls for some sparkle. I traced the 'Beautiful' sticker with a brown pen to make it stand out.

The next page features Anabelle and her furry siblings: the family cats!


Since Andréanne puts so much importance in her friendships, I decided to create a double-page layout featuring the friends who came to meet Anabelle shortly after her birth.


Since I once again had so many great pictures, I used another tag to create a mini-layout within the layout. I used small letter stickers to add the names of Anabelle's visitors to the page.


On the next page, I used pictures of Sam (my son) and I meeting Anabelle at the hospital. Sam loves babies and he was so intrigued by Anabelle. All he wanted to do was kiss her! Luckily, my husband was able to get a shot of Sam kissing Anabelle.


I used pictures from Anabelle's baptism on the last double-page layout of the album.  Didn't Anabelle look so cute in his baptism dress?!


My favourite items used on this page are the pearls (I have no clue where I bought them or which company makes them!) and the cork scallop piece from Close to My Heart.

I used another tag to add more pictures to the second page:


I made a flower using beautiful pink ribbon and a paper circle and glue. I put glue on one side of the circle and I wrapped the ribbon around it, starting on the edge towards the middle. I finished it off with the great piece of bling in the middle. I love the sparkles!

Last but not least is the final page of the album. I used a die cut cork piece from Close to My Heart and stamped the words 'Handcrafted with love'. I didn't know this before but cork takes ink really well!

On this page, I decided to write a message to Anabelle that was from the heart. I said that she was wanted and that her parents and her extended family had been waiting for her. I wished her a life full of joy and love. I told her that she was surrounded with people who love her, including me.

And there it is folks, Anabelle's album. This album personifies what scrapbooking is for me:  showcasing beautiful pictures and telling a story. I have to confess that I am VERY proud of this album. I think it's the best work I've ever done.

I came back from the scrapbooking retreat on Sunday. On Monday evening, I couldn't wait anymore and I went to visit Andréanne and Anabelle to give them the album. Andréanne loved it. She even cried. I'm happy that she loved it so much and I hope she sees it as a testament to how much I value our friendship. But, I really made it for Anabelle. She might be too young to appreciate it now...but my hope is that she treasures it when she is a bit older. Who knows, she might look at it later on in her life and be inspired to start scrapbooking herself.

And the addiction gets passed on to another generation!


Happy scrappin'!

Friday, 13 April 2012

NAV, here I come!

I scheduled this blog post to go up while I will on my way to my first scrapbooking retreat. To say that I'm excited is an understatement! I've been counting down the dodos! Spending a whole weekend scrapbooking with my best friends sounds like a good time to me!

Kathleen and I will be driving together and sharing a room. We've done this countless times in our late teens and early twenties. To save $100, it seemed like a no-brainer. The bed will be small (double) but I promised Matt (my husband) that I would take pictures of the sweaty pillow fights that will unevitably happen (because, when girls get together, there are always sweaty pillow fights...according to Matt anyway), so he's happy!

I'm looking forward to not having to worry about anything but scrapbooking. We're staying and scrapping at the NAV Centre and all our meals and snacks are provided and included in the price. It's really a great deal. Regardless of the fact that it's a great deal, it'll be even better to have a whole weekend away from laundry, dishes, cooking and life in general. By Sunday, I'll be ready and happy to come home to Matt and Sam.

Now...what to pack? I started packing on Monday. I finished Thursday evening. He's a picture of my pile-o-stuff:

Yeah, I know...that's A LOT of stuff! I'd like to point out that none of this pile is my actual clothes. This is a only scrapbooking stuff.

Somewhere in this pile is my camera. I'll take lots of pictures and write a blog post (or two, or three) about my experience when I get back.

Happy scrappin'!

Thursday, 12 April 2012

What to do with tranparencies?

If you're like me, you love Fancy Pants Designs. I have bought more than a few of their collections over the years. Their kits often come with a transparency and/or transparency cut-out pieces. I always would look at this stuff and wonder: What the heck am I gonna do with this?!

This weekend, I decided to get out of comfort zone and use the transparencies from the It's Your Day collection. I think the results are pretty fantastic, if I do say so myself.

These layouts feature pictures taken at my friend Sherry's birthday party in November 2011. Here is a double-page layout I created using transparencies:


On the first page, I used one of the transparency cut-outs:


Since these pictures were taken during and after we sang Happy Birthday (badly) to Sherry, I thought the musical notes were appropriate. I used a few dots of Glossy Accents to glue it down. It worked really well.

Other supplies and techniques used: Rub-on from the collection as a title; stickers from the collection (border and flower on the left side of the page); Martha Stewart punch to create the border around the journalling box I made; sanding the edges of the two smaller pictures; and, making the fan flower myself (I'll get more into that later).

I used a 12x12 transparency on the second page. To make the design stand out more, I layered it on top of a yellow piece of 12x12 cardstock. I love the pop of colour!


I mentioned earlier that I made my own fan flowers. Tim Holtz has dies for the Big Shot to make them. They are fantastic dies and they work really well. That being said, you don't need the dies and Big Shot to make these flowers. All you need is a ruler and a ball tool. You use the ruler to measure the same space between each use of the ball tool. All the ball tool does is give you a place to fold later on. You can make the spaces as narrow or wide as you want and you can make your flowers narrow or wide by adjusting the width of the piece of paper. You then fold it accordian style and glue the ends togehter...tada! BTW, there are tones of tutorials online to get more detailed instructions on how to make these. Check out this tutorial by Helen for instructions.


On the third page I made using transparencies, I again used a 12x12 transparency from the collection but this time and layered it on top a piece of pattern paper (also from the collection) in a contrasting colour. I love the effect!


I made my own fan flowers again but this time, I decided to use one of my Close to My Heart fabric buttons on the bigger orange flower.


I love that I managed to finally get use out of the transparencies that came with a kit! But even though I used a new technique, I still stayed true to myself. These layouts are still very me: they are about the pictures and the story.


Happy scrappin'!

Tuesday, 10 April 2012

Diane should have a blog

I'd like to make an appeal: Diane, you should have a blog. There. I said it. It's out there.

This is my friend Diane in her scrapbooking element:


Of all the people I know who scrapbook, I think Diane is the most creative/talented, both in her organization of her scrap space and in her actual layouts and projects (That being said, I know a lot of talented and passionate scrapbookers! Check out my friend Natalie's blog My Two Left Hands, my friend Kathleen's blog Kitty's Crafting Corner and my friend Nathalie's blog The Creative Cellar.) And I'm not just saying this because, you know, I kinda like her. In all seriousness, Diane is amazing at the whole being crafty thing. I wish I had her talent! She's also humble about her talent. Best of all, Diane is such a supportive friend that she likes everything that the Scrapbooking Divas produce...or at least she lies convincingly!

I'm lucky enough to be her friend and bask in her awesomeness. I think Diane's blog would be amazing. It's not like she's ever at a loss for words!


Happy scrappin'!

Monday, 9 April 2012

Crazy Kettlebellers

In later 2011, one of the scrapbooking divas (can't remember which one but I think it was Diane...or maybe Natalie...) suggested that we all get the same kit and use it to create layouts. We would then compare our layouts to see the similarities and differences.

We actually took the plunge in January 2012. We all got the same Christmas kit and magic ensued. You can read all about it on Natalie's blog, My Two Left Hands. Natalie's blog includes my submission to the experiment.

Today, I'd like to go back to those layouts because I love them so much. This double-page layout features pictures taken at the KTK Christmas party.


These are some pretty simple layouts but, like I said, I love them. They are a microcosm of what scrapbooking represents for me: capturing memories.

On the first page, I cut nine squares of three different pattern papers. I added a piece of rick-rack ribbon, a flower, star pins, journalling box and a great title. All these items were from the kit that the divas and I purchased. I added a great picture of some of my favourite people and voilà!


On the second page, I sanded the edges of the pictures to make them stand out. I repeated the rick-rack ribbon, star pin and flower. I made my own journalling box by using a tag and Glimmer Misting it with Olive Vine.


These pages remind of a great evening with people who mean the world to me. As I blogged about on my other blog Getting to 175lbs, my kettlebell friends not only make exercise more fun, they also make my life fuller. I cherish these friendships and thank God that I have these people in my life. These scrapbook pages remind me of that every time I look at them.

Happy scrappin'!
Saturday, 17 March 2012

Year 3 comes to an end...

My little guy Sam turned 3 in the fall and I'm just getting to his birthday layouts now! Oh well, I guess 6 months behind isn't that bad!

I organize Sam's scrapbook albums by year of his life. His scrapbook (who am I kidding...scrapbook? More like scrapbooks!) for year 3 ends with his birthday layouts (just like year 1 and 2 did). These layouts are the last ones I have left before moving on to year 4...OMG! My kid is in the fourth year of his life! Where did the time go?! So, it was bitter-sweet to create these layouts.

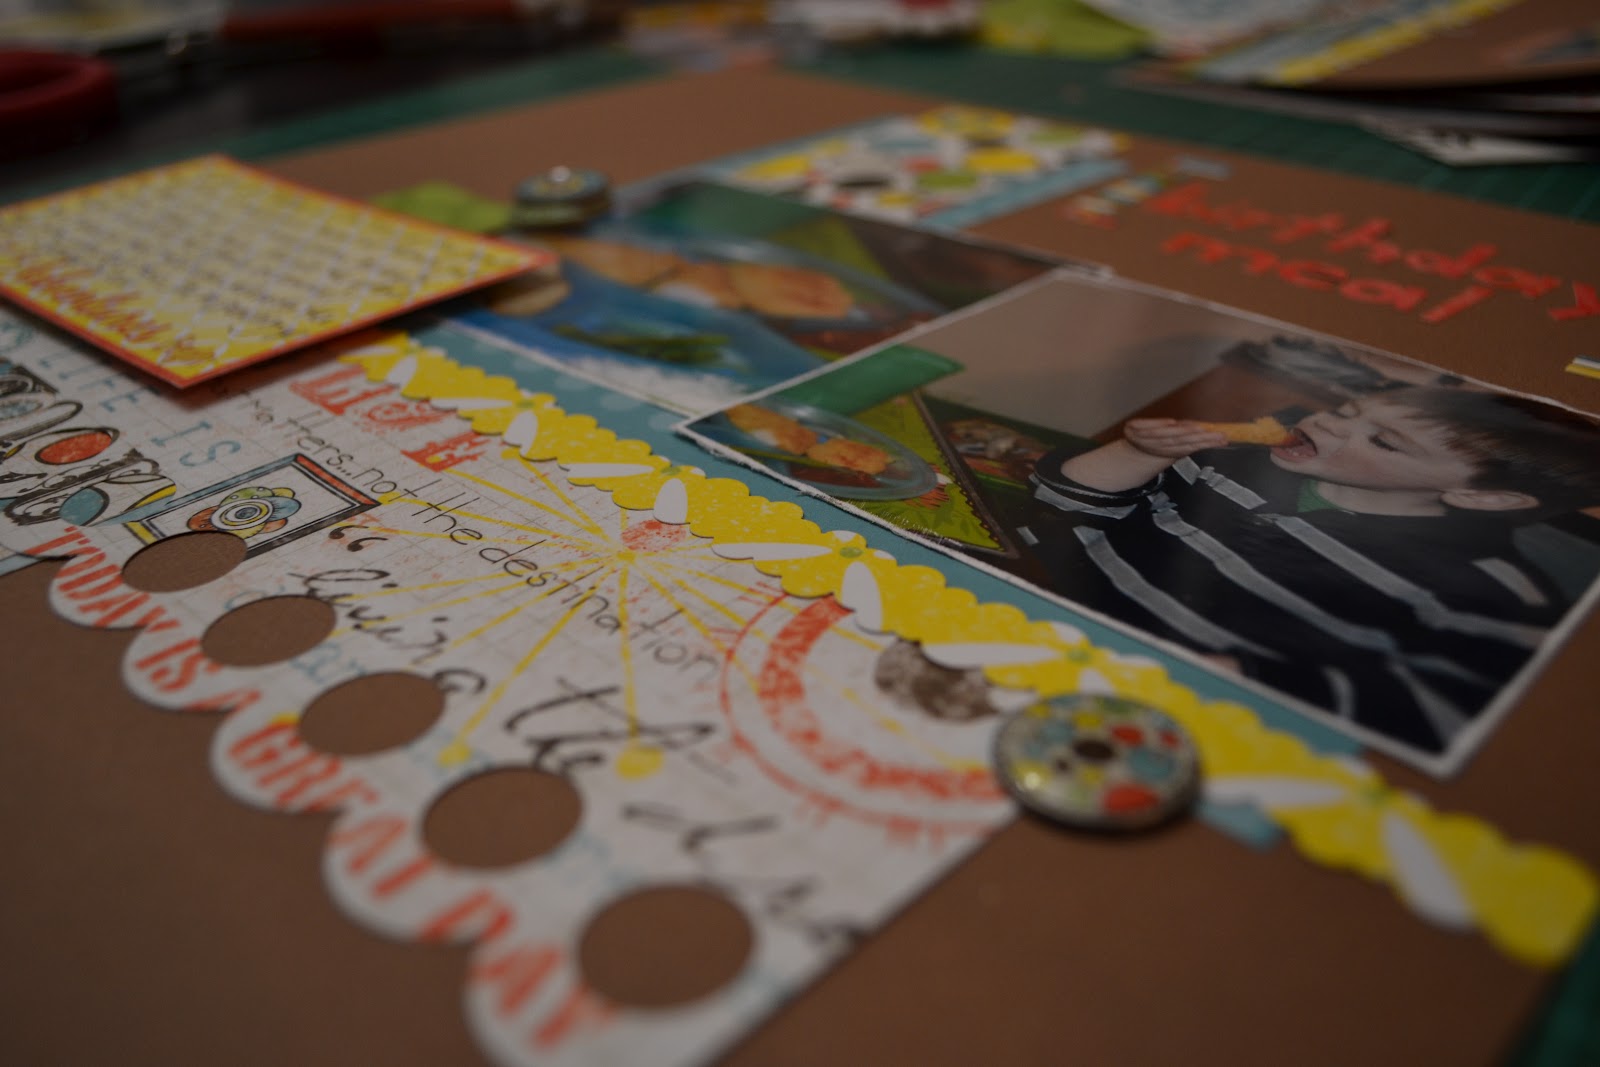
Layout #1: Birthday Meal /  Diego

This first double-page layout is of Sam having his birthday meal and cake. My little guy isn't complicated: he likes chicken fingers and fries. I tried to sneak some veggies on his plate but he's too smart to fall for that. At the time of his birthday, he was obsessed with Diego. Consequently, I asked our local bake shop to make him a Diego cake.


I used Bazzill cardstock for the background. The wonderful pattern papers are from the Ad Lib line by Bo Bunny. Bo Bunny is one of my favourite scrapbook companies. I loved this line so much that I used every single paper and then bought a second pack!


My first page looks simple enough but the layering of different pattern papers took me forever! Everything except the cardstock is from the Ad Lib line. The colours go so well together!


I used two different border punches on this layout. I love border punches! I think I must have about 7 or 8 of them and that's no where near enough!


I try to use the letter stickers that come with the line. Bo Bunny always does such a good job with their embellishments, including stickers.


I used a lot of the same techniques on the second page, including using border punches, sanding the edges of the pictures and using embellishments from the line. I also added a twine detail along the paper border. On the first page, I used a journalling box included in the kit. I couldn't find one that I liked for this page so I created my own.

As a sidebar, I want to put a shout out there for journalling. I believe most pages need journalling to really qualify as 'scrapbooking'. Or else, to me at least, it's just a fancy photo album. Not every page needs it but I think it adds something to the page. Just my two cents.

By the way...the cake was DELICIOUS!

Layout #2: Presents

This double-layout features Sam unwrapping and then playing with his gifts.


One the first page, I cut four different pattern papers and distressed the edges of each square. I then created a grid with my pictures.

+

I stitched around the edge of the cardstock using the Sew Easy system. I repeated the twine by wrapping it around brads in the centre of the page.


On page #2 of this layout, I used pictures of Sam playing with his gifts.


I used another one of my trusty border punches on this page! I also created my own journalling box on this layout by using a chipboard element and a scrap piece of paper from the kit.


Year 3 comes to an end! Time to start a new album for year #4. I'm excited to start scrapbooking another year in Sam's life. He's such a amazing little man and the best looking kid I've ever seen (not that I'm biased at all!) that it's so much fun to create these layouts.

Happy scrappin'!

Tuesday, 6 March 2012

Dixon's Corners - It's a wonder we've been invited back!

This past weekend, I went with my divas to Dixon's Corners to participate in an all-day crop. The event was a fundraiser and all the money raised goes to help build a school in Zambia. It's nice that the event was for a good cause but really, like I needed that as an excuse to have a scrapbooking day!
You might have guessed that the fundraiser was organized by a church group and was actually held in the church (well, in the room adjoined to the church). I have nothing against churches. They are usually nice places. But it's a small wonder that: 1) I don't get struck down by lighting when I walk in, and 2) The divas are invited back. A bunch of us had attended the Dixon's Corners crop in November...we were our normal selves and were still invited back...this time...not sure we'll be invited back a third time!

Evidence of our (mis)behaviour:


Devil horns in a church...

*shaking my head*

We did eventually get down to the business of scrapbooking. I managed to finished three double-page layouts, all Christmas themed (that's all I brought with me...I have dozens of Christmas layouts to do!).

Gifts from Diane
My first layout of the day was of pictures taken when my friend Diane and I exchange Christmas gifts. This layout is a bit out of my comfort zone. It's quite distressed for my liking. Honestly, this layout took way more time than I wanted it too! Here is the first page:


I started off by using an edge distresser to distress 3 sides of the my base cardstock. It's white core cardstock so it really shows when the edges are distressed. I found the green polka-dot paper, the orange stripped paper, the tag and the journalling tag in my personal stash. I used a border punch on the orange stripped paper.

I used a product that I had never used before on this layout: Tim Holtz Idea-ology Christmas collection. I inked it with Distress Ink.


Finally, I decided to try a technique that I saw my friend Nathalie (from The Creative Cellar) attempt: basically rip your paper and sew it back together. With the help of my friend Natalie (from My Two Left Hands) I selected a button to glue at the end of the stitching.

Here is the second page:


I used the same products and technique on the second page. I added the green ribbon, the brad and the small frame (which I inked with Distress Ink).

Here is the final product:


On to the next layout!

Out to Lunch
My second layout was of pictures taken during my work Christmas lunch. I wanted to use leftovers I had from the Bo Bunny Winter Frost collection I had bought last year. Here is my first page:


 It was challenging to put so many pictures on one page. I like the simplicity of the page. I added just a touch of bling with a Pearl Pen.


I put so many pictures on the first page because I knew that I want to do a single photo layout on the adjoining page. Here it is:


Again I used leftover from the Winter Frost collection. As Natalie says, I embrace white space. Yes I do and I'm proud of it! Here is the final product:


Tree/Family
My third and final layout of the day was of pictures taken when my family decorated the Christmas tree. Here is the first page:


Again, I really wanted to use leftovers I had from and Echo Park Christmas collection that I had in my stash - and I did. I even use brads from the Winter Frost collection I already mentioned. Other products used: Bazzill chipboard with Hula Hoop Glimmer Mist and Sew Easy.


Lastly, I decided to add some dimension to the page using pop up tap on the title.


Here is the second page:


As is my style, I repeated most of the same techniques and products from the first layout. I really like the Tim Holtz paper!

Here is the complete layout:


I had so much fun creating these layouts! Most of all though, I enjoyed the day with my friends. Thanks to the ladies who organized the crop. See you next time...if we're invited!